I admire my friends who do plein air. They go out and just spontaneously paint. There is very little about a drypoint print that could be considered spontaneous. That being said, it doesn’t have to be a means to a cold, black and white end.
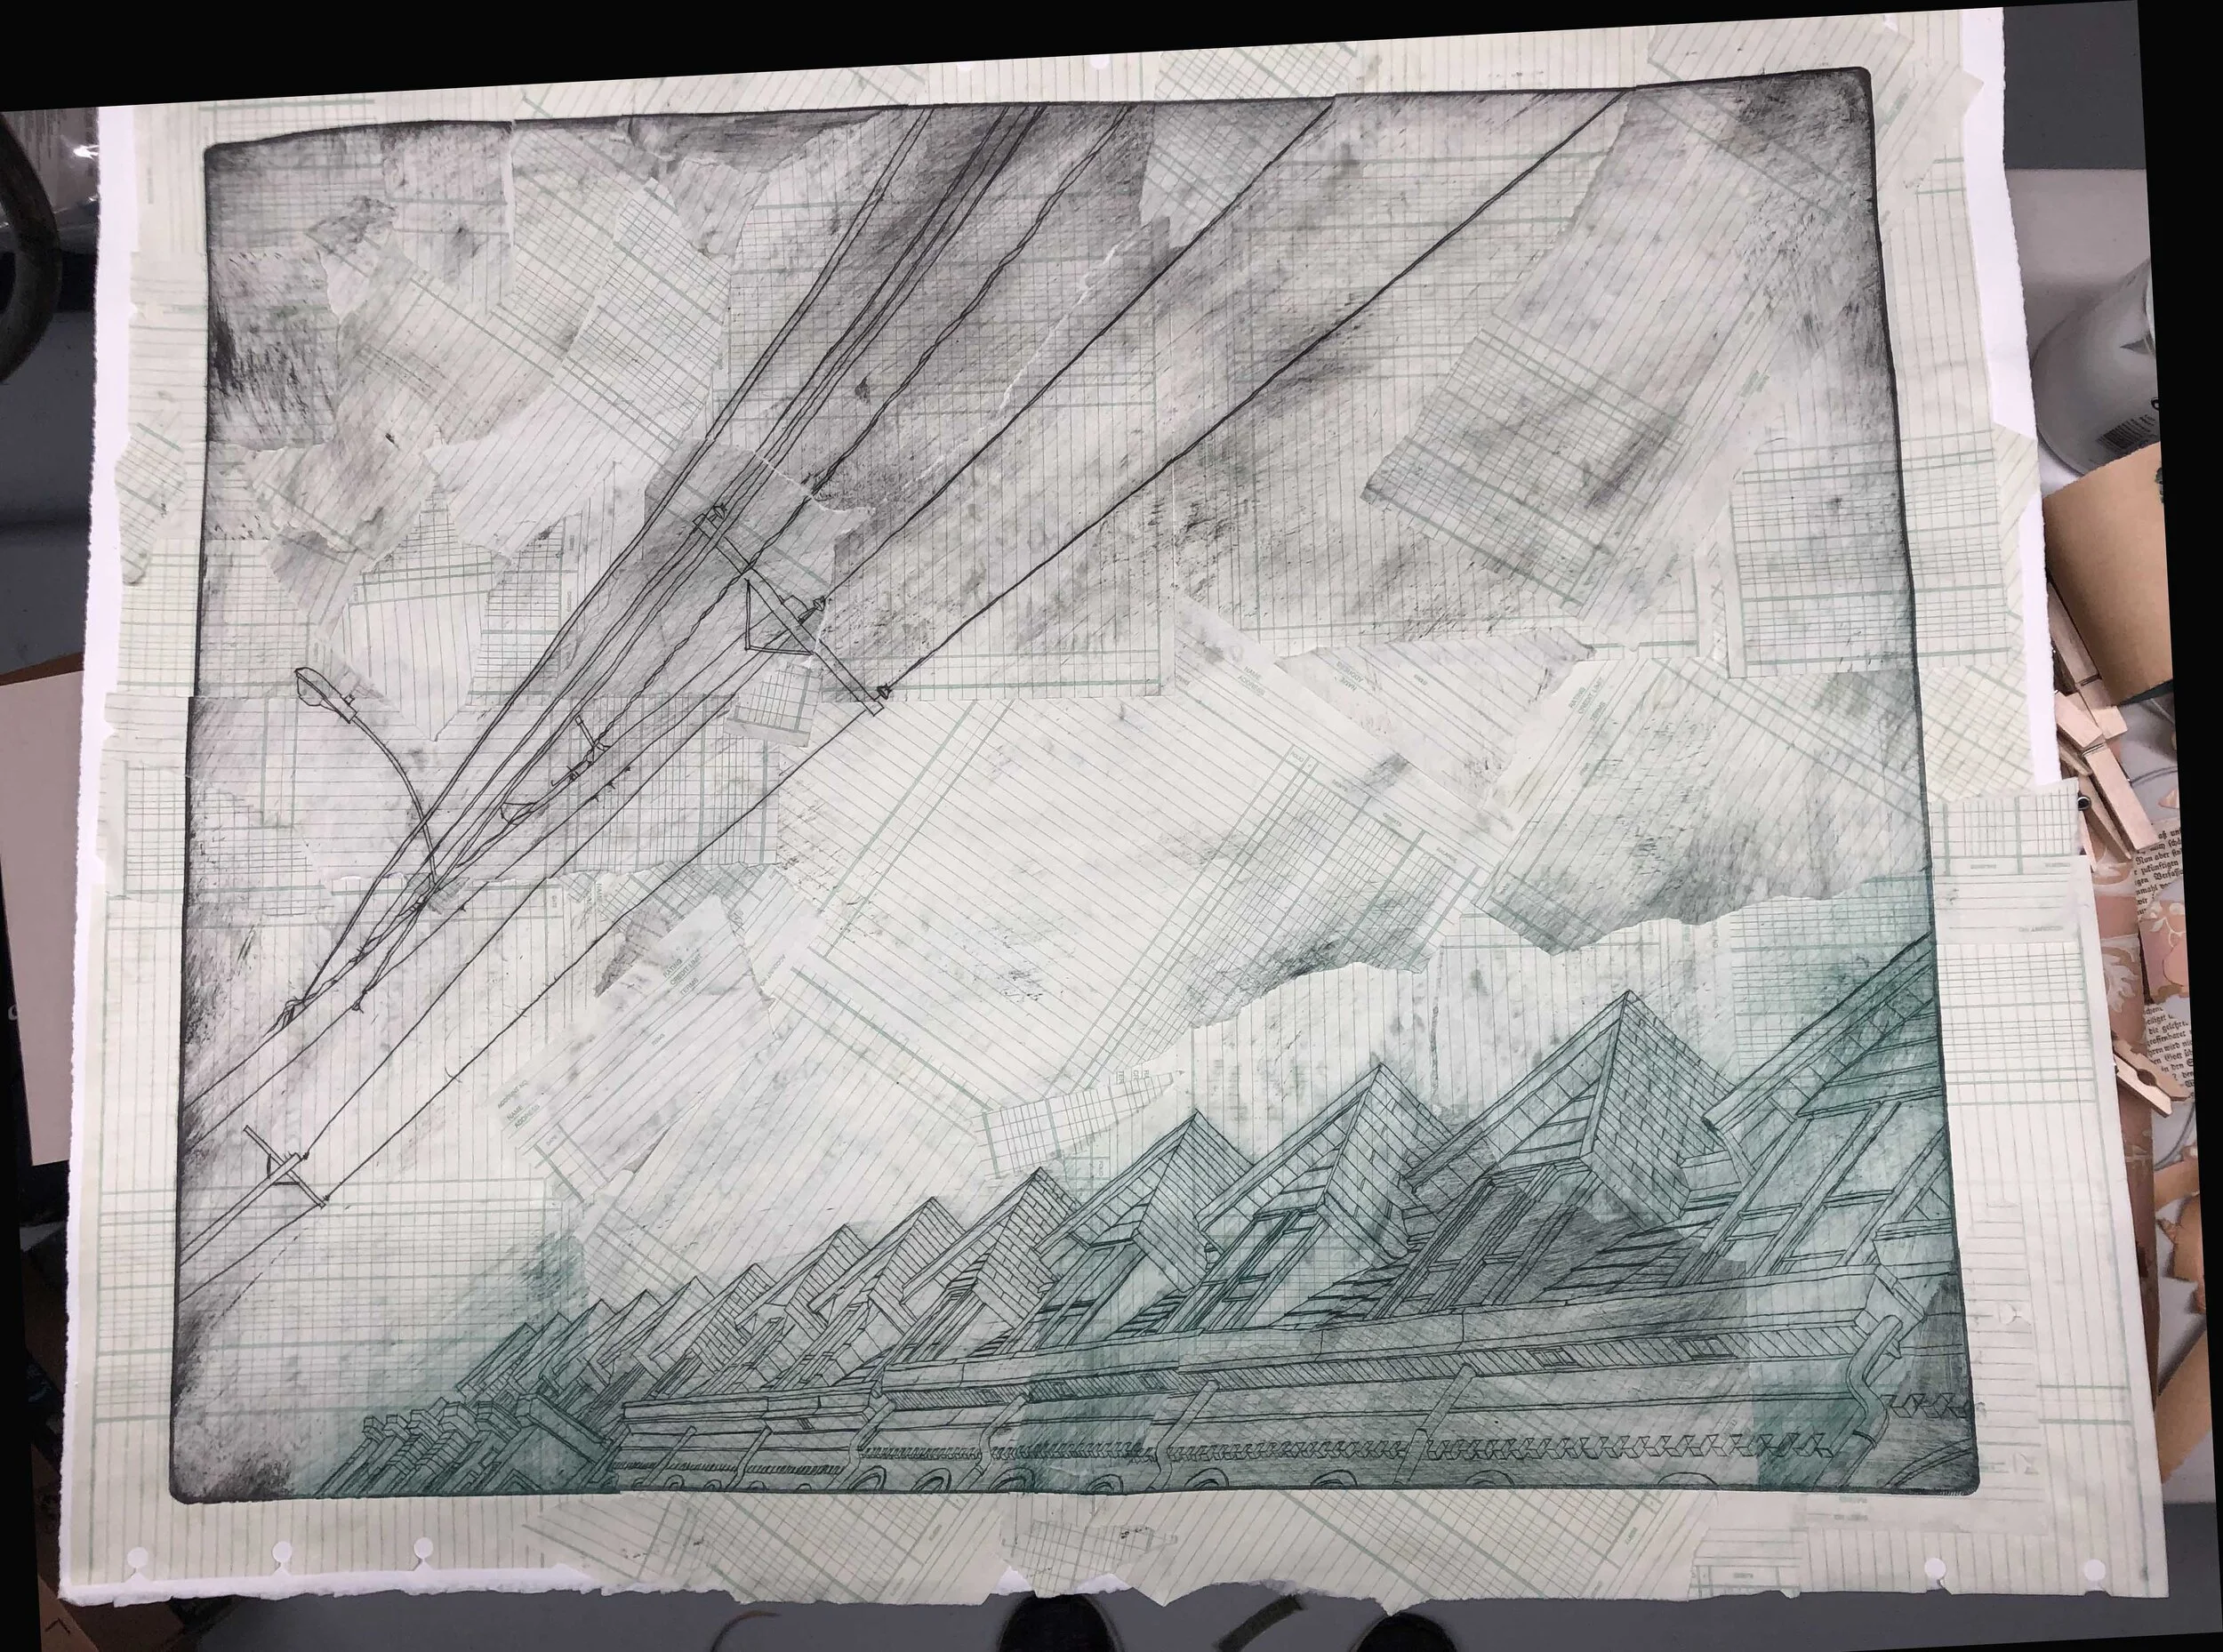
![Leaning Rowhouses [green]](https://images.squarespace-cdn.com/content/v1/5882c79429687f5efc6ab887/1600302236930-TM4NOZ9A80T161X76BRZ/Schorr_Natalie_12+smaller.jpg)
Leaning Rowhouses [green]
I did a residency at Remarque New Grounds Print Workshop in Albuquerque in February 2019. I had my drypoint plates already done since they were large and took days to etch, and when I got there I printed like a fiend, which I think drove my whole cohort crazy. Then I shipped everything home and thought about it for several months.
When I first tried my hand at printmaking, I took a little six week class in traditional etching, and we were taught to make multiples that needed to look as much alike as possible. Boring. So in the years since, I have looked for new ways to approach printmaking that would be more flexible. Not quite plein air, but certainly not a series of pieces all just alike.
I like to think of printmaking as a way to tell a story with a different ending each time. Let me show you.

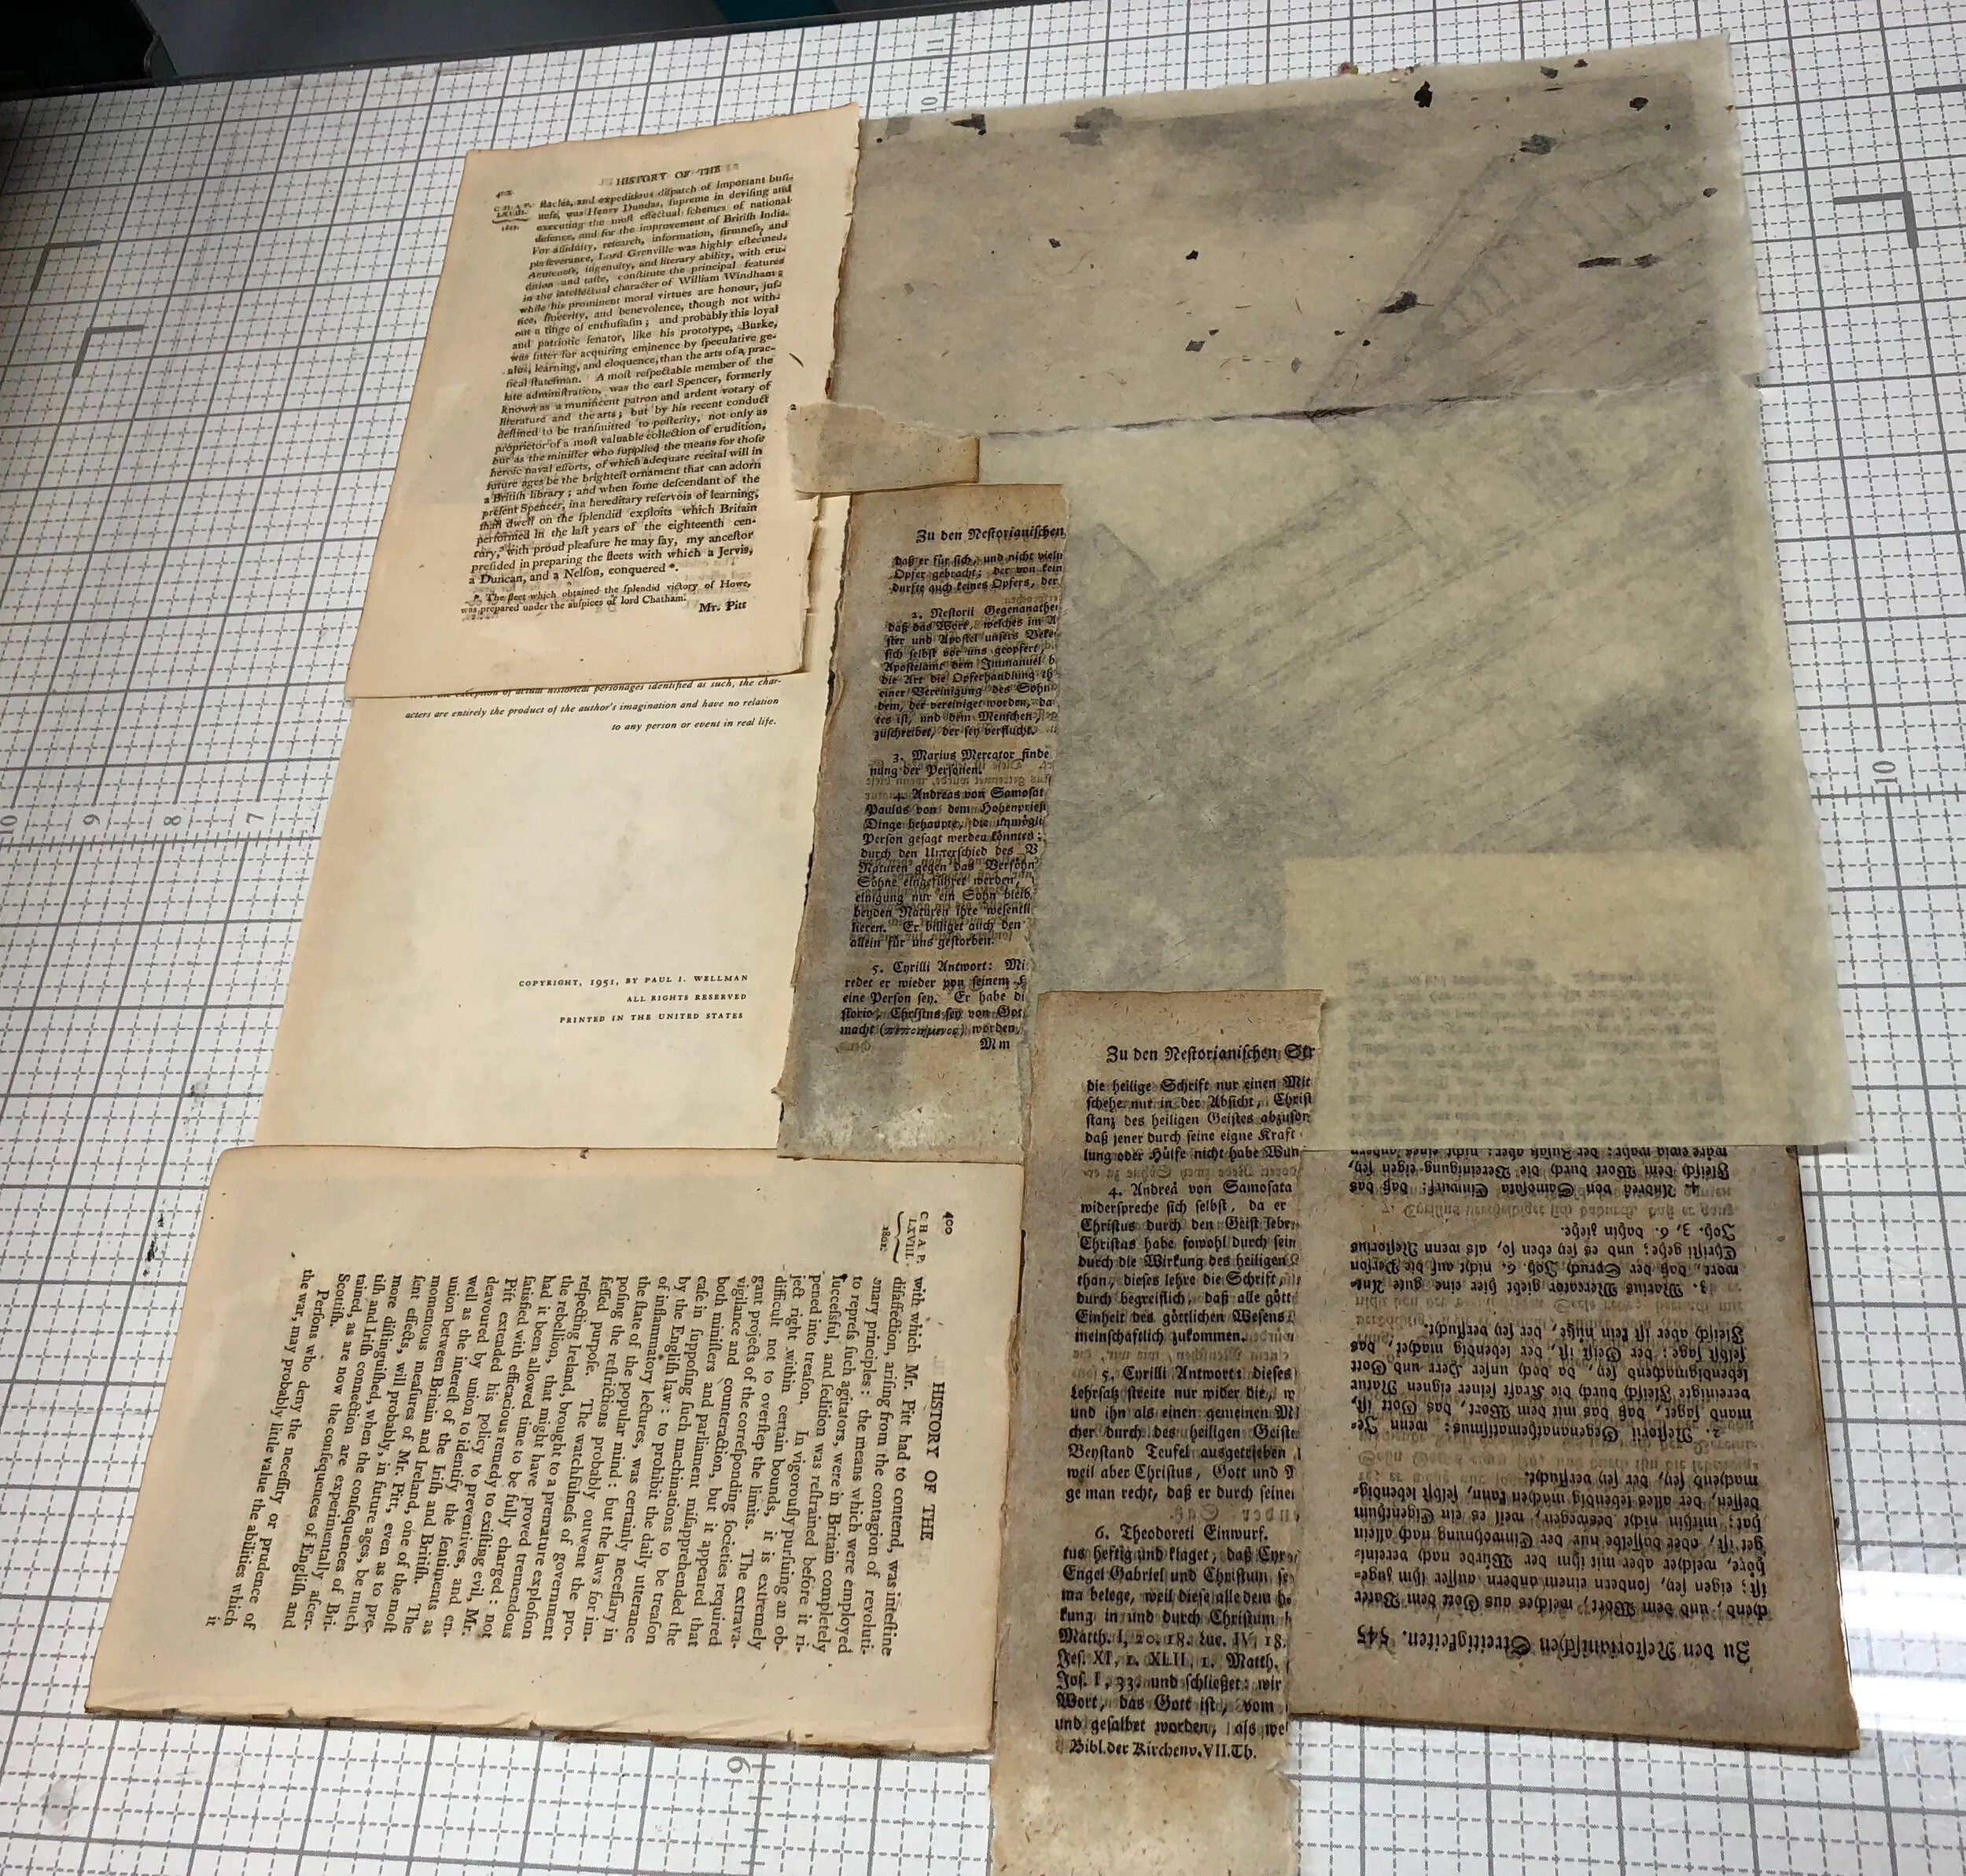
Drypoint collage in progress
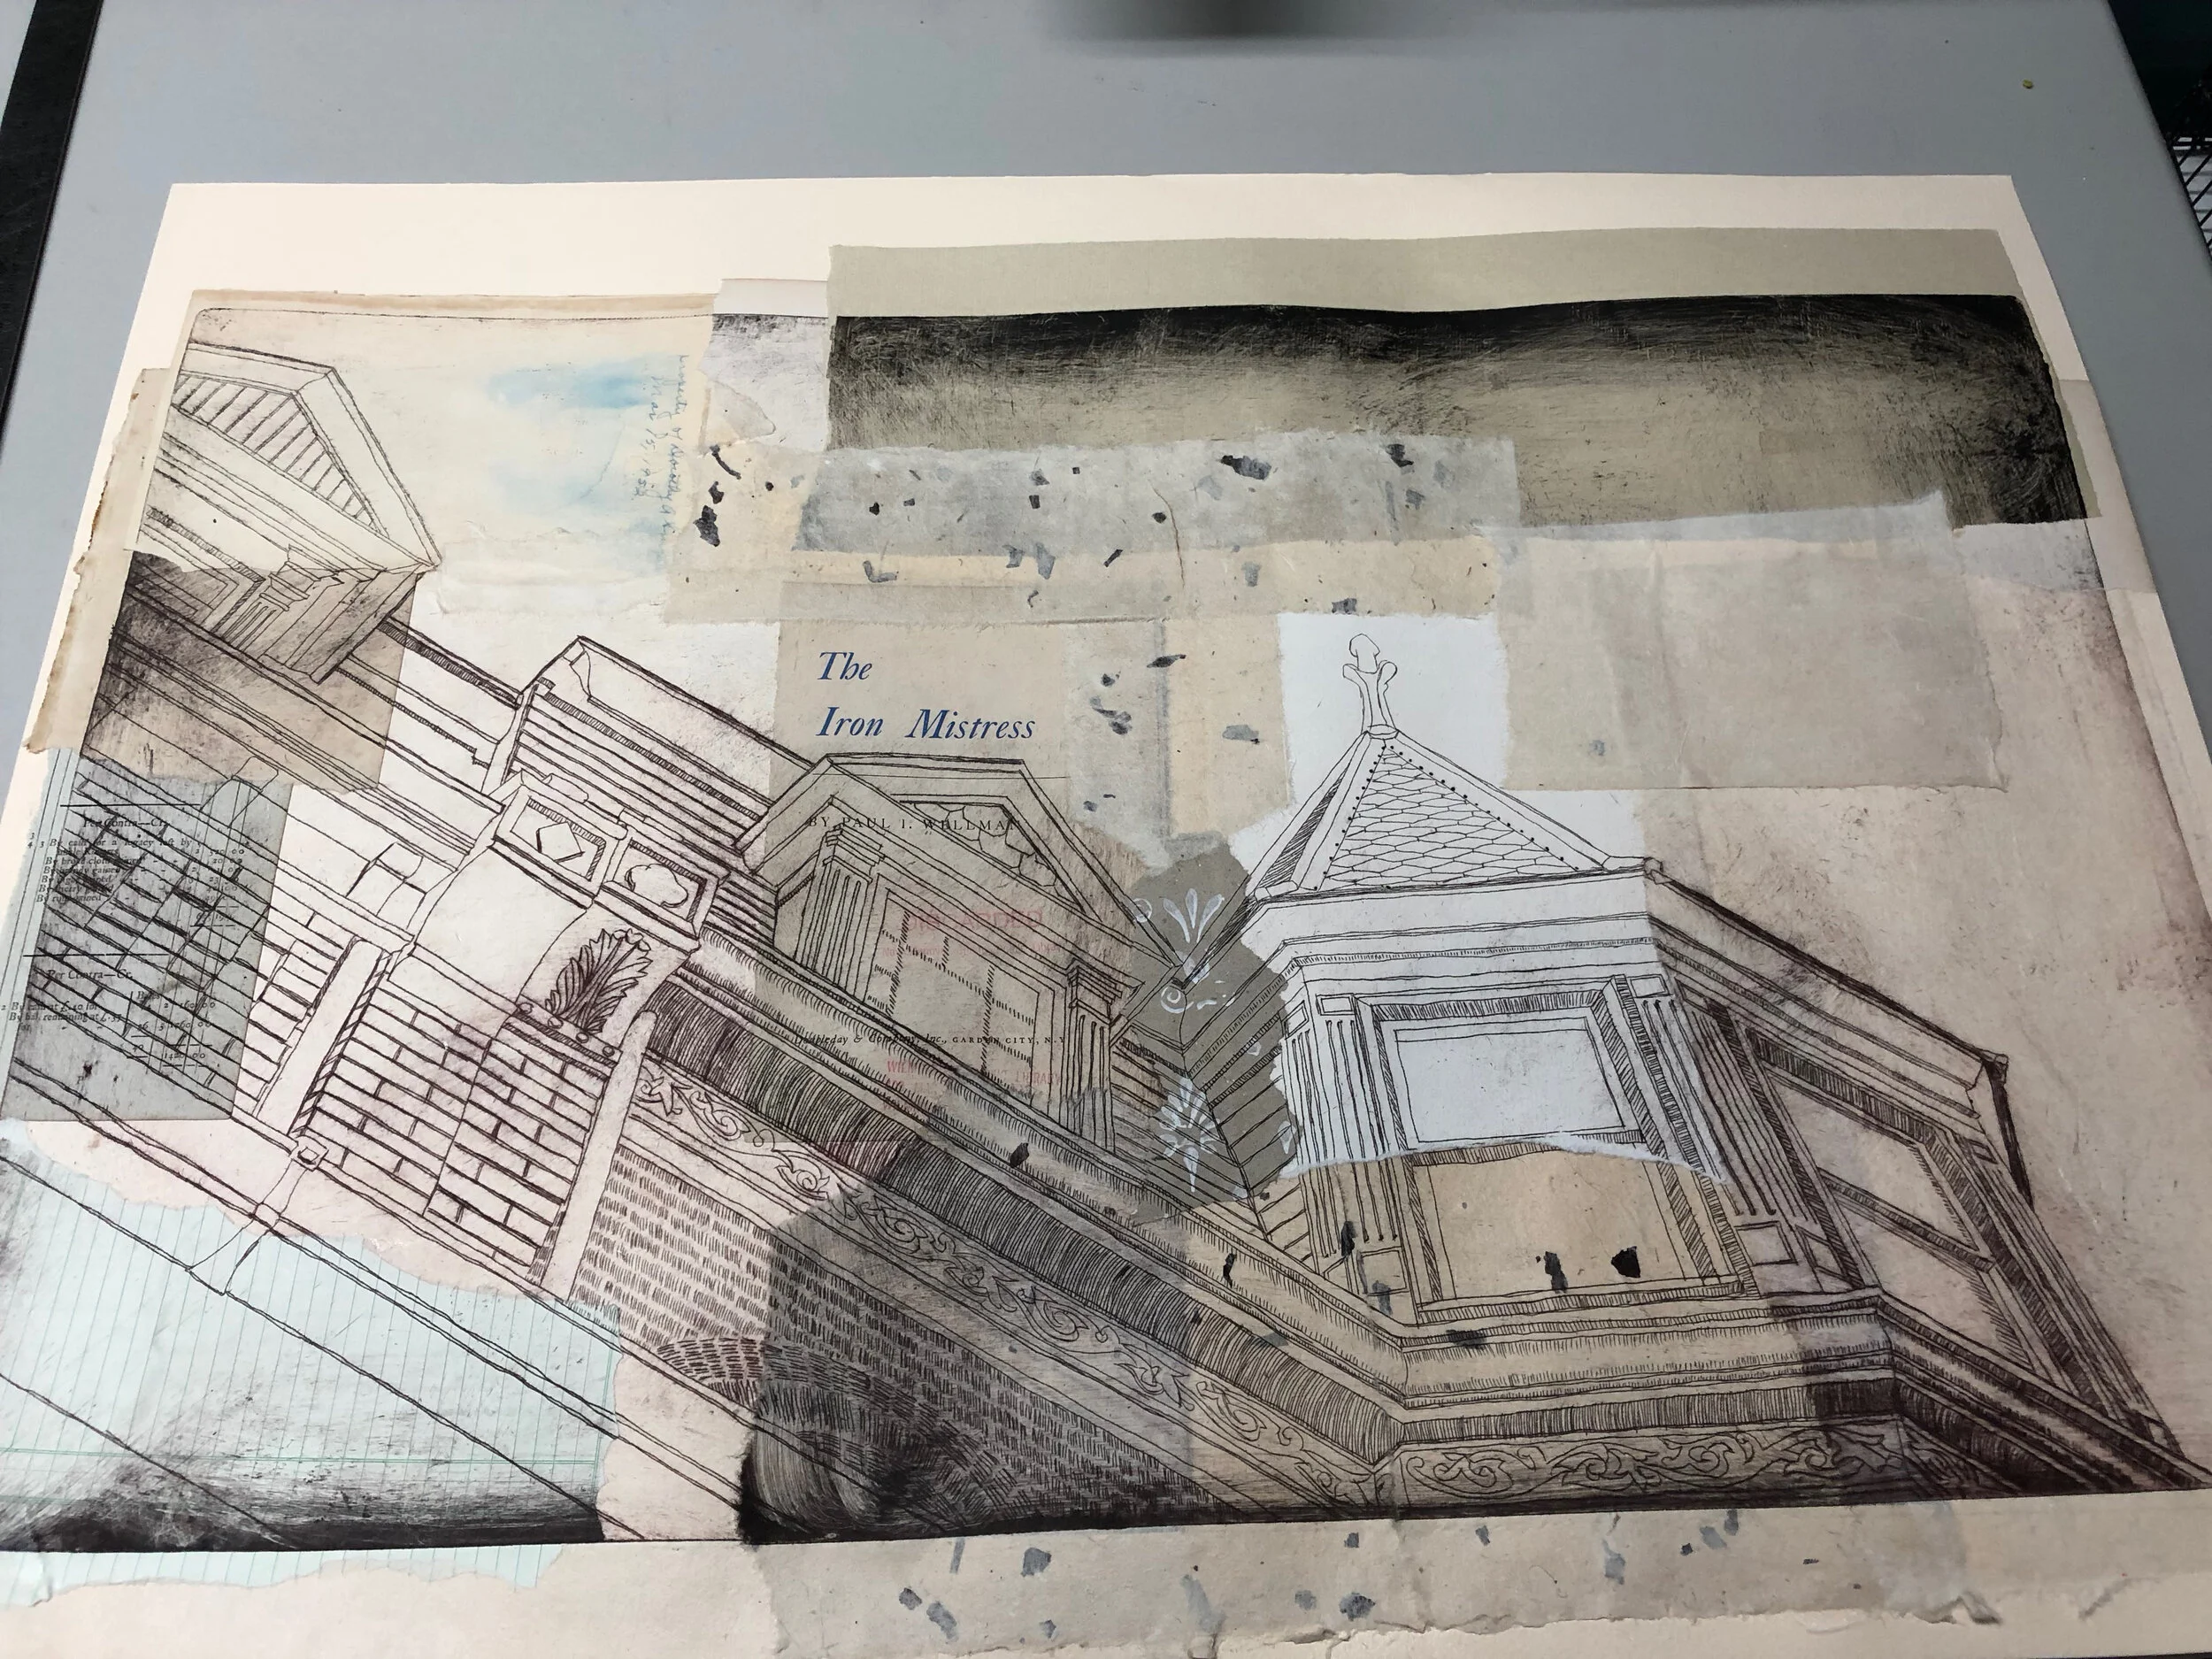
I did this plate while I was at Remarque. It was a line of rowhouses with power lines running alongside, which I had photographed from an odd angle. I did a number of prints of this plate, among which were a series in deep red ink on cream and pink found papers and wallpaper, and a series in green and black inks on green ledger paper.
Old books, vintage wallpaper, and Goodwill finds are some of my favorite things.
After several months of beneficial rumination, I took out my pieces and composed two versions of the plate. [more to come]
At the top of this photo you can see a plain print of the plate in black ink on a single sheet of paper. This is my key image, which allows me to fit the collage pieces together on top. That image gets fully covered in the collage process. Then I have a lot of little pieces that have bits of the overall image printed on them, and these will be composed and collaged together.
Once the collage is completed, I go into it with watercolor, acrylic, or colored pencil to bring out features I want to emphasize. In previous ones, everything was covered in clear acrylic so they could be framed without glass, but these I made without the acrylic coating.
The finished pieces in this method are all very unique, and though not as spontaneous as plein air, for me they tell the same story, each one with its own ending. I like that.
![Leaning Rowhouses [pink]](https://images.squarespace-cdn.com/content/v1/5882c79429687f5efc6ab887/1600302953675-5S6NUQJ4VSV76OT11YPL/Pink+Rowhouse+smaller.jpg)
Leaning Rowhouses [pink]
See Leaning Rowhouses [green] on its gallery page to learn more.
See Leaning Rowhouses [pink] on its gallery page to learn more.